...

Tuesday, 17 February 2015

HEALTHY PROTEIN PANCAKES


HAPPY PANCAKE DAY!

So I know this recipe is very belated as you've already all made your pancakes, so please forgive me... And try them out on the weekend! Weekends are 10000X fuelled by breakfast pancakes??

I had these as brunch and they were yummy-scrumptious.

For these I used PB2 white chocolate protein peanut butter for this recipe, but a healthy nut butter would work too as it's naturally high in protein! I also used a gluten-free flour which is cheap enough to pick up in your local supermarket! For even more protein, you can add flax or chia seeds for a natural protein boost, or some protein powder for the protein-enthusiasts.

You will need:

  • 100g gluten free flour
  • 2 medium-sized eggs
  • 3 tablespoons protein nut butter
  • 1 tablespoon honey
  • Coconut oil
  • Fat-free natural yogurt to serve
Steps:
  1. Mix all of the ingredients - I did this with a hand blender, otherwise you'll struggle to mix the nut butter evenly.
  2. Heat the coconut oil in a pan (about 3/4 of a teaspoon) for a little while on a medium heat and add about 3 tablespoons of pancake mixture.
  3. Cook as you would a normal pancake, using a spatula to flip until golden-brown.
  4. Serve up with your favourite topping and enjoy a protein-boosting treat!
I had some with natural yogurt and a drizzle of honey, and also had some heated with banana slices and a little honey. Both were super good! And microwave re-heating worked surprisingly well! I hope you enjoy!

Courtney xx

Wednesday, 11 February 2015

HEALTHY VALENTINE'S DAY VEGAN TRUFFLES


So the weekend is looming and that means Valentine's Day! I for one am very excited!!

And what better way to celebrate than with (semi) healthy truffles! And YES, there is such a thing! Plus they're super easy too! And they taste like very guilt-ridden chocolate truffles (but of course they're not) aka SCORE! So let's get to it!

You will need:
  • 1 cup dates
  • 1/2 cup cashew nuts 
  • 80ml of water
  • 1/4 cup cocoa powder (raw cocao powder would be even better - unfortunately I couldn't get hold of any - but Waitrose do sell cocao for those of you in the UK)
Steps:
  1. Pour the cashew nuts into a food processor and blitz on high for about 2 minutes until they form a cashew powder. Pour out of the food processor and put aside.
  2. Add the cocoa/cocao powder to the cashew powder and mix.
  3. Add the dates and water to the food processor and blitz on high for about 2 minutes until they form a paste.
  4. Add the cashew and cocoa powder mix to the food processor and mix again for a further minute. Eventually you should end up with one big ball of mixture - a giant truffle!!
  5. Use a teaspoon to spoon out mixture and using the palms of your hands, roll into balls and roll in dusting. I also made some truffles which I rolled in desiccated coconut which is less traditional but I loved (and preferred)!
  6. And enjoy with a glass of champagne or as a cute gift idea, place some tissue paper in a small gift box and put some of your lovely truffles inside!
Happy Valentine's Day for Saturday! Courtney x


Saturday, 7 February 2015

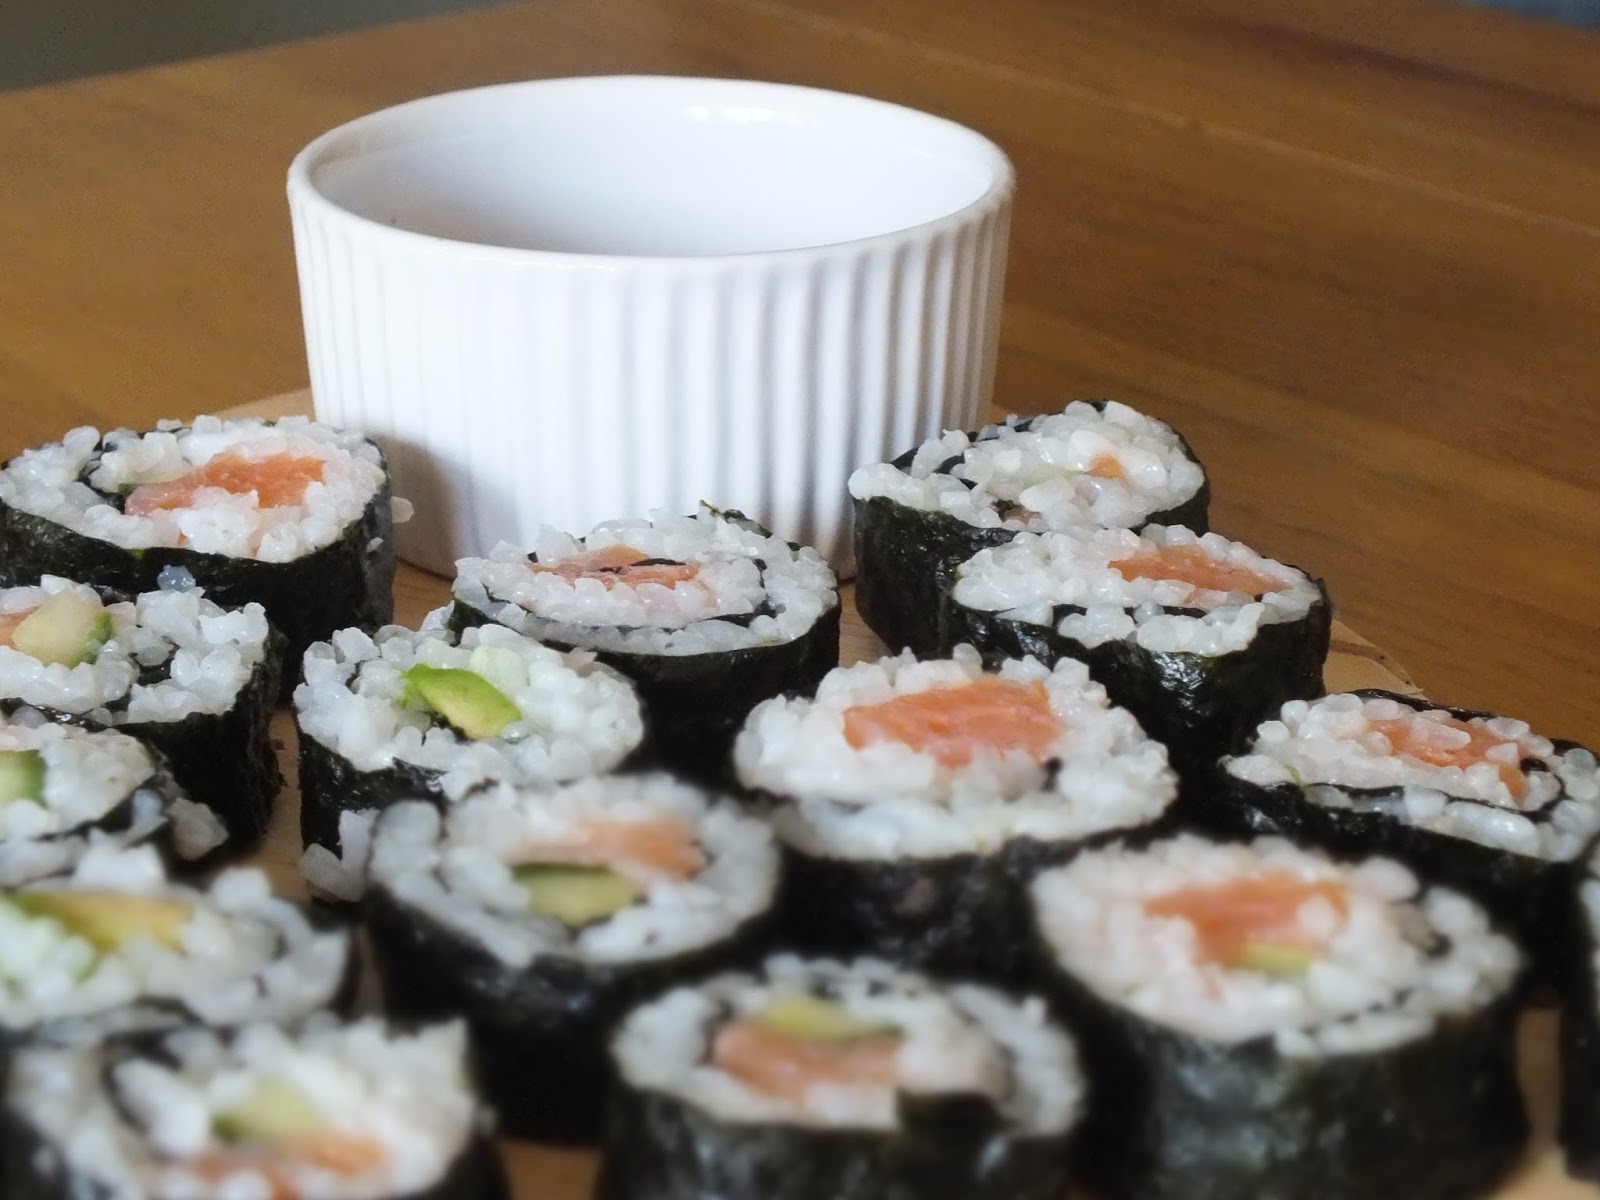
HOMEMADE SUSHI TIME


So let's talk facts... We all LOVE sushi right??

But shop-bought sushi is overpriced and never quite as good - and you can't decide what you have in them. HOMEMADE SUSHI IS THE WAY FORWARD!

All of this sushi was less than £10 and there were probably about 40 pieces!!! And BIG ones too, not those little tiny sushi rolls! I made some salmon, some salmon and cucumber and some plain avocado (the vegetarian option).

BANANA OATMEAL BITES TO REPLACE YOUR 'COOKIE JAR'


Hello! So to stop me digging through the biscuit barrel, I made my own little healthy 'cookie jar' with tiny little banana oatmeal bites! These are totally healthy, completely vegan and so so so simple and quick to make!

This is just bite-size versions of this recipe here from earlier this week, but I thought I'd share this cute little idea with you!

Have a beautiful day! Courtney x

Wednesday, 4 February 2015

THE INCREDIBLE LIMBER STRETCH - MY NEW ESSENTIAL LIFE AND WORKOUT PIECE (AND 20% OFF DISCOUNT CODE)


PRESENTING THE AMAZING LIMBER STRETCH!!!

So at first I was a little skeptical about how I would use this belt and wasn't sure if I'd have much use for it... And how wrong was I!!! In short; I LOVE this belt. It's an absolute essential for me now - both a lifestyle AND workout essential. So I thought I'd give you a detailed review of the product and hopefully you'll think about buying one too!! To be honest, I think it's actually a very sound investment. I will DEFINITELY stick with this belt. I've had my belt for about 5 days and barely taken it off.


Firstly, I don't know how much I can emphasize that this belt is sooooo comfortable. In fact, the other day I just wore it all day and almost completely forgot about it hah! Its Spandex Lycra band just sits effortlessly around your waist or hips. And even when you have your phone and other belongings in the belt, sitting down is just as comfortable.


I was a little worried about the sizing, because I have quite a small figure and an especially small waist. However, the smallest size fits wonderfully on my hips and doesn't loosen when I move. But the great thing is, they offer to replace your band if you do pick the wrong size, so you can't be put off by sizing!

I went for the black band, which is really subtle and looks like part of my yoga pants/running tights and just goes so well. Though I'm actually considering getting one of the aqua coloured ones to show off because that one is such a nice colour and would like nice in the summer hah!


As I've mentioned, I was skeptical about using it for running, but I MUCH preferred it to the usual arm band!!!

 I was also expecting the band to keep moving as I ran, and having to readjust it, but not at all - it stayed in place for a whole 5K! And it was SO comfortable. The problem with armbands is they wobble around and loosen and if you wear a jacket, and want to take it off whilst running, you can't without stopping your run, because it's strapped around your arm. I also really preferred having all of my belongings just at my waist so that I don't have to worry about them. It's much more comfortable on your waist and you don't feel the weight of your phone moving at all, like you would with an arm band.

Another feature I love is the little hook inside which I like to put my house key on so that you have no worries at all about it coming loose. However even running with my phone, key and money (as I was stopping off at the shop afterwards) was no problem at all and I didn't feel like anything was going to fall out during the run.

Also, I love to use the Nike+ Running App and having the phone easily accessible on my waist means that I can easily take it out mid-run and check my distance/speed/etc and easily place it back in - something I wasn't able to do with a running arm band. As well as running I also wore it to yoga, and even through extravagant poses it stayed in place and remained really comfortable with my belongings in


This belt is also really ideal for taking my dog for a run because normally I end up running with a handbag with treats and poo bags and my money and phone in (which is a nightmare) but this makes for effortless dog walking/running. Especially in the summer when I won't have jackets and coats with pockets in, I can't wait to wear this!!! I can imagine that it would be perfect for cycling and hiking too in the summer, which I'm looking forward to. I'm also doing some travelling soon with a lot of long flights and moving about and I just know that my travelling attire will be yoga pants and my Limber Stretch band as I'll be able to keep my passport, phone, money and boarding passes right around my waist (especially as I won't have jackets and coats where I'm headed)!! EXCITING TIMES!


So on the whole, I COMPLETELY recommend this product because it's so versatile and comfortable and convenient and I think everyone will have a use for it and some of you will have loads of uses for it like me! There's such a sense of freedom with being completely hands free! Especially during exercise or travel when you're rushing about and really do want to be hands free! I LOVE my Limber Stretch band!!!!! It is WELL worth the money! And the material feels really durable so hopefully it'll last a long time too!

You can order this band from Amazon UK by searching the Limber Stretch or by clicking this link here! AND FOR ONE MONTH I PRESENT YOU THE CODE: LOVEHUGS for a further 10% off of the price which already has 10% off, giving you a 20% saving!

P.S Delivery was super speedy too, I received mine within 3 working days!

Have a beautiful day!!!!! Courtney x

Sunday, 1 February 2015

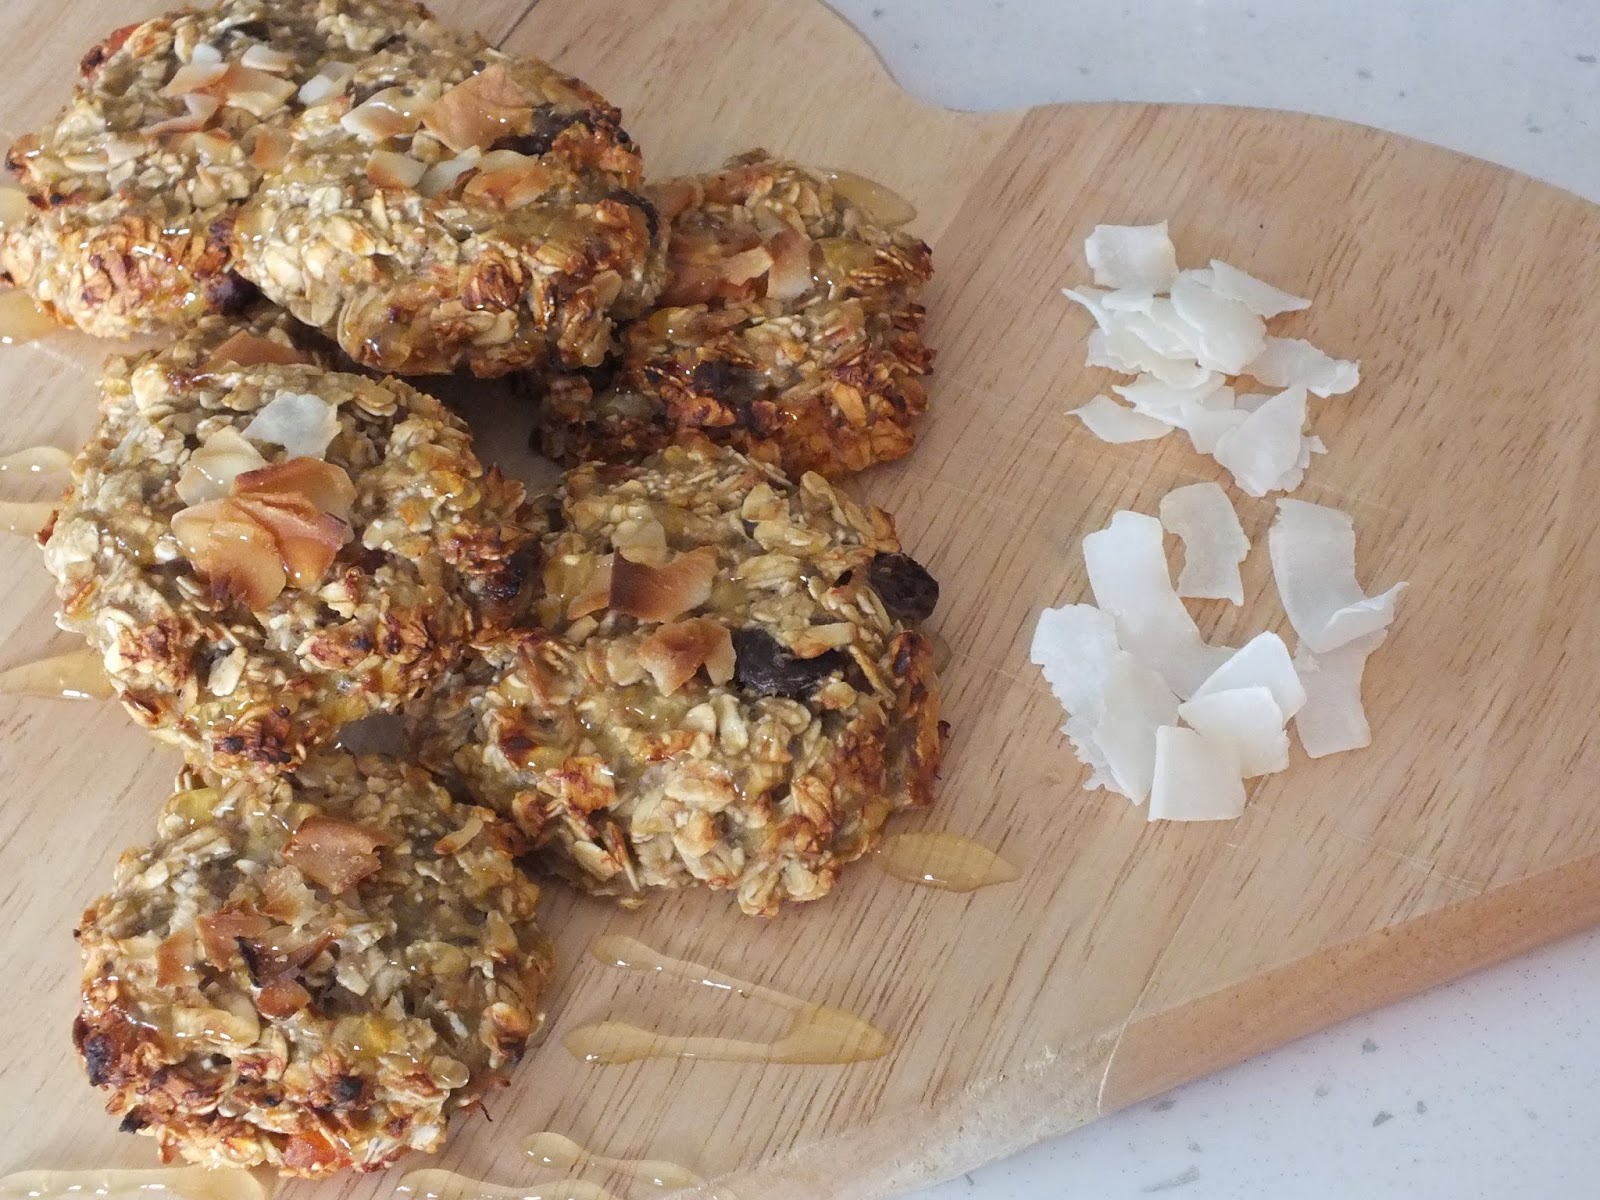
OATMEAL BANANA BOOST COOKIES


These are wondrous, wondrous little beauties. Honestly, they're magical...

They only have a few ingredients, they're packed with goodness, they'll give you energy AND you can have them ready to eat 20 minutes from now! They're nice and crispy on the outside and moist and banana-y on the inside, YUM! With their slow-release energy they make perfect breakfast cookies, or on-the-go snacks for work or hiking etc!

Now I made these today because a) at the moment I have an overwhelming urge to eat cookies/biscuits and thought that if I make a healthy alternative at least it won't be so bad if I fail to keep these cravings at bay and b) I have a lot of bananas left over c) I had run out of healthy snacks and literally only had 20 minutes to spare before I had to leave the house! 

For this, I used wholemeal oats with raisins and papaya (you can literally use any kind of healthy oats)!

Cooking and preparation time: 20 minutes total

You will need:
  • 2 medium sized bananas (the softer the better)
  • 1 cup oatmeal
  • 1 tablespoon honey
  • A few coconut flakes (optional)
Steps:
  1. Preheat the oven to 200° C for fan ovens and 220° for conventional.
  2. Use a potato masher to crush the bananas until they're a runny mixture.
  3. Add the cup of oatmeal and tablespoon of honey to the banana and mix well.
  4. Place a sheet of baking paper on a tray and use a tablespoon to spoon the mixture onto the paper and pat down and shape using the spoon.
  5. Place a few little coconut flakes/desiccated coconut on top of the cookies.
  6. Place in the centre of the oven for 15 minutes.
  7. Remove from the oven and leave to cool on a cooling rack.
  8. Drizzle with honey and enjoy as breakfast cookies or as an on-the-go healthy snack!
Have a beautiful day! Courtney x


MEDITATION AT MEAL TIMES


So at the moment I'm reading 'The Miracle of Mindfulness - the classic guide to meditation by the world's most revered master' / Thich Nhat Hanh and it has brought to light some wonderful things I'd like to share with you.

~ Mindfulness should not just be something practiced during 20 minutes of daily meditation. ~

It should be something you work on whenever you can. And one example of when we're very bad at living in the present moment and being self-aware is meal times/snack time/ tea time. We tend to prepare our next forkful before we've finished the present one, eager to get onto the next task of the day, or drink a cup of tea whilst watching the TV and barely even realise we've drank it. Or the worst... Read through your e-mails on your phone over breakfast. This is the opposite of being mindful - this is living in the future, moving from one activity to the next, constantly one step ahead.

Food and drink is one of the ways in which we nourish our bodies, and these should be times of calm, present thinking. You should take each forkful or each sip at a time and proceed only after that. Hanh teaches that meal time is one of the perfect times of the day when we can practice mindfulness in a meditative way, by concentrating and appreciating the food and drink we have and thinking about its flavours, being careful not to let your mind drift to the next task of the day.

I find this easier by planning my day. Making lists in the morning and evening - so that I allow myself time to be mindful and present without scurrying thoughts and mental lists that I'm trying to keep a hold of.

I propose you put down the electricals! NO phones or TV during meal time. Take meal times as an opportunity to meditate and be mindful.

Plus, if your goal is weight loss, taking time to concentrate on your food will subconsciously make you feel more full than if you eat your food and barely realise you have done so.

Have a beautiful day!

Courtney x

Thursday, 29 January 2015

VIETNAMESE SPRING ROLLS


I LOVE oriental food. What's more? I love HEALTHY oriental food. Deliciousness and raw flavour but completely guilt-free! And totally vegan!

This recipe is actually mega easy too, and honestly, really, really good! I recommend a serving of 3 spring rolls per person, served with the rest of the noodles and veg or sushi rice. So the following servings will serve 2. You can see in the background of the image above how much was left over - but this is nice to have with the spring rolls I think.

You will need:

  • 6 sheets of rice paper
  • 3/4 a cucumber
  • 1 large carrot, peeled
  • 200g bean shoots
  • 1 onion
  • 1 pack vermicelli noodles (rice noodles)
  • Basil
  • Sesame seeds
  • Soy sauce
  • Hoisin sauce (homemade recipe here)
Steps:
  1. If your noodles are dry, soak them in boiling water for about 5 minutes and then drain them and add a little soy sauce and basil for flavour. If you have fresh noodles, don't worry about this step.
  2. Cut the cucumber into 3, 3-inch segments and cut away the outsides so that you're left with a block of the seeds - you don't want to use this part. Cut the rest into small matchstick slices.
  3. Peel the carrot and cut into matchsticks.
  4. Cut the onion into small strips also. Add a teaspoon of olive oil or coconut oil to a pan and add the onion and bean shoots to the pan. Stir-fry for 3-3.5 minutes. Then set aside on a plate to cool.
  5. Get a bowl of warm water and dip one side of the paper in, and rotate. And continue to do this for one rotation and then rotate one more time immersing the whole rice paper in the water. This is very important, trying to place the rice paper straight into the bowl will snap it.
  6. Place the rice paper flat and add the cucumber and carrot sticks flat in the centre of the paper. Use them as a guide, trying to add ingredients only on top of them, not allowing them to overflow too much. Then add a small amount of noodles and the onion and bean shoot mix. Sprinkle over some basil and sesame seeds. 
  7. Fold the left and right sides over your ingredients. They should just cover both ends of the cucumber and carrot. Then fold over the bottom layer, follow by wrapping the top layer over.
  8. They should then be complete! Serve with noodles, rice and hoisin/soy sauce.
  9. Enjoy!

Saturday, 24 January 2015

HEALTHY BANANA BREAD


Who doesn't like banana bread? Moist and comforting banana bread. Mmmmmm.

This recipe is quite simple, and quite healthy too because of the substitutions. Now this recipe includes plain and self raising flour, but it depends how fluffy/moist you want your bread. If you want really fluffy light bread then use more self raising, if you want more dense and moist banana bread (how I prefer it) then use more plain wholemeal flour. As long as the overall flour amount is 240g it doesn't matter. Note, this recipe works a lot better with really overripe, even brown bananas - so don't throw your old bananas away!

You will need:

  • 140g plain wholemeal flour
  • 100g self-raising wholemeal flour
  • 3 medium eggs
  • 1 teaspoon baking powder
  • 1 teaspoon bicarbonate soda
  • 300g overripe mashed bananas (about 3 medium bananas)
  • 140ml natural yogurt (I used fat free greek style natural yogurt)
  • 4 tbsp agave nectar (or honey/your desired liquid sweetener)
  • Walnuts to finish

Friday, 23 January 2015

NANO ENGRAVED JEWELRY


I just wanted to share with you this truly beautiful masterpiece! This was a Christmas gift from Philip so unfortunately I don't know where it's from, but I just had to share this with you guys! It's a gold frame with black onyx and nano engraved with gold. It's a Buddhist necklace and came with a little magnifying glass to read the engraving. It reads:

Metta Meditation
May I be filled with loving kindness
May I be well
May I be peaceful and at ease
May I be happy

May all beings be filled with loving kindness
May all beings be well
May all beings be peaceful and at ease
May all beings be happy


Have a beautiful day
Courtney xx
You may also like