...

Wednesday, 11 February 2015

HEALTHY VALENTINE'S DAY VEGAN TRUFFLES


So the weekend is looming and that means Valentine's Day! I for one am very excited!!

And what better way to celebrate than with (semi) healthy truffles! And YES, there is such a thing! Plus they're super easy too! And they taste like very guilt-ridden chocolate truffles (but of course they're not) aka SCORE! So let's get to it!

You will need:
  • 1 cup dates
  • 1/2 cup cashew nuts 
  • 80ml of water
  • 1/4 cup cocoa powder (raw cocao powder would be even better - unfortunately I couldn't get hold of any - but Waitrose do sell cocao for those of you in the UK)
Steps:
  1. Pour the cashew nuts into a food processor and blitz on high for about 2 minutes until they form a cashew powder. Pour out of the food processor and put aside.
  2. Add the cocoa/cocao powder to the cashew powder and mix.
  3. Add the dates and water to the food processor and blitz on high for about 2 minutes until they form a paste.
  4. Add the cashew and cocoa powder mix to the food processor and mix again for a further minute. Eventually you should end up with one big ball of mixture - a giant truffle!!
  5. Use a teaspoon to spoon out mixture and using the palms of your hands, roll into balls and roll in dusting. I also made some truffles which I rolled in desiccated coconut which is less traditional but I loved (and preferred)!
  6. And enjoy with a glass of champagne or as a cute gift idea, place some tissue paper in a small gift box and put some of your lovely truffles inside!
Happy Valentine's Day for Saturday! Courtney x


Saturday, 7 February 2015

BANANA OATMEAL BITES TO REPLACE YOUR 'COOKIE JAR'


Hello! So to stop me digging through the biscuit barrel, I made my own little healthy 'cookie jar' with tiny little banana oatmeal bites! These are totally healthy, completely vegan and so so so simple and quick to make!

This is just bite-size versions of this recipe here from earlier this week, but I thought I'd share this cute little idea with you!

Have a beautiful day! Courtney x

Sunday, 1 February 2015

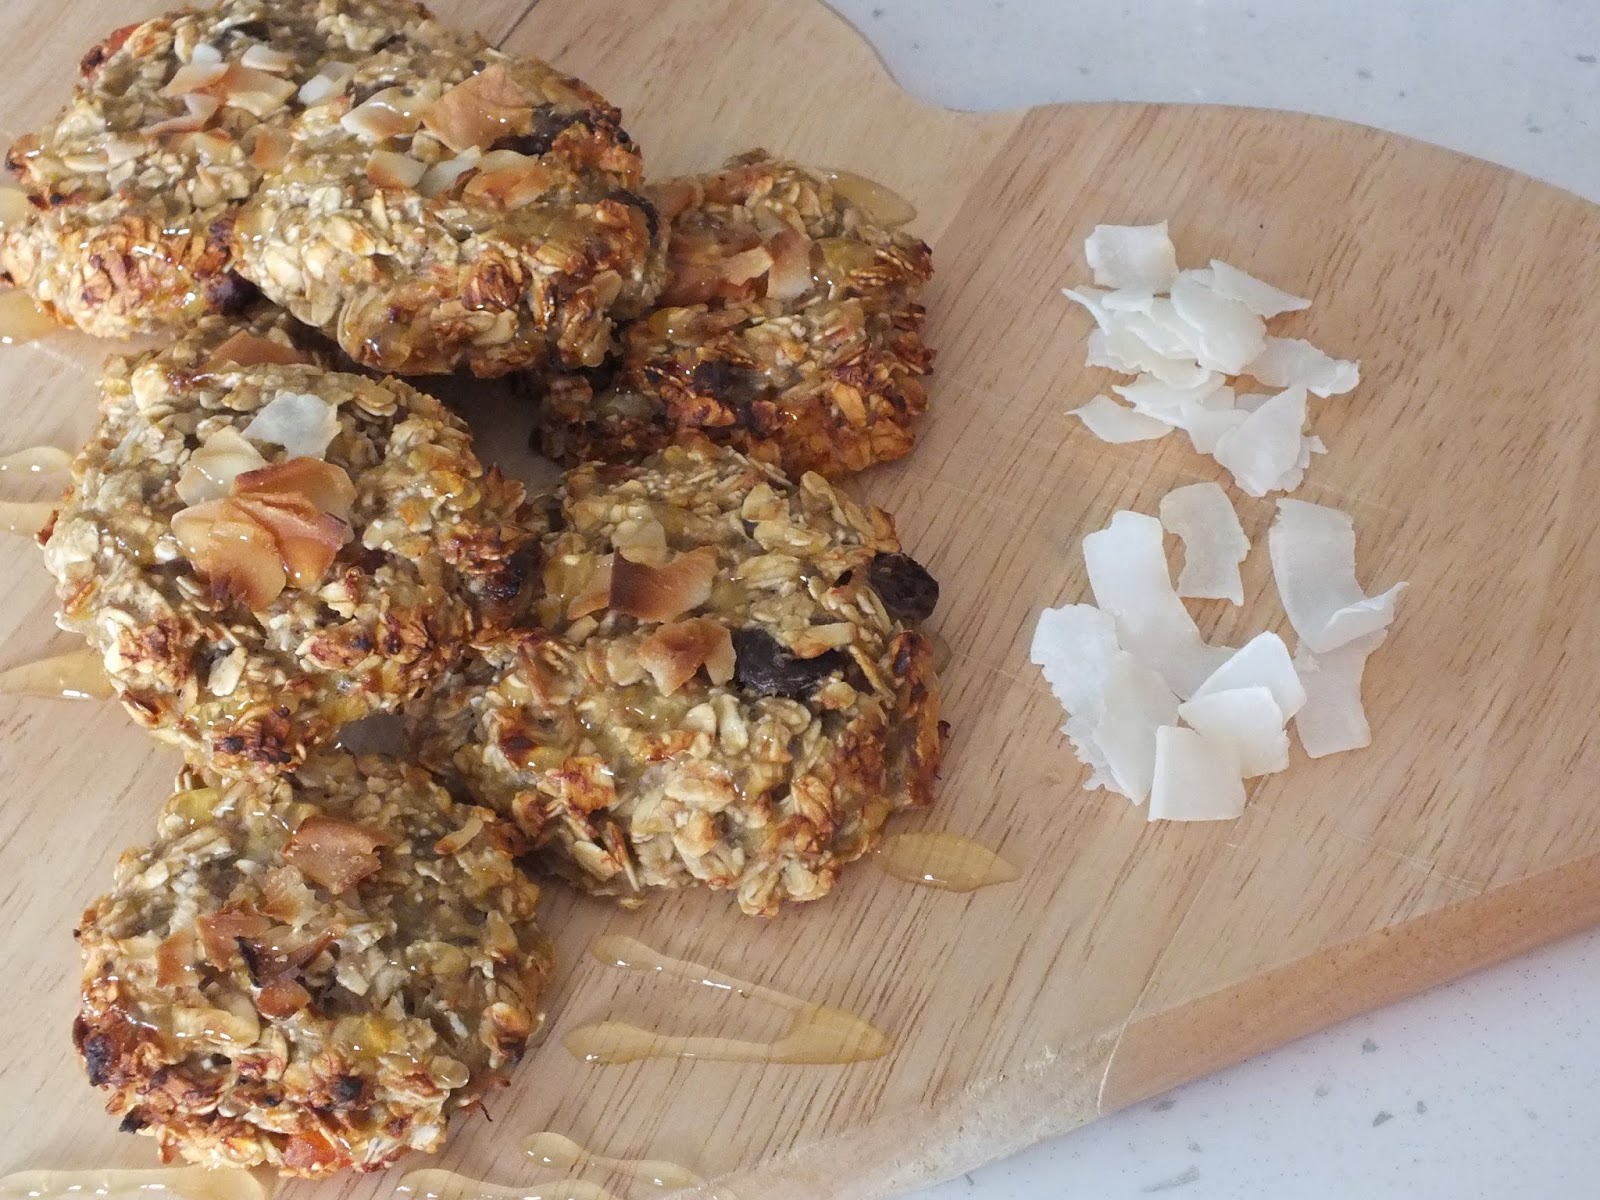
OATMEAL BANANA BOOST COOKIES


These are wondrous, wondrous little beauties. Honestly, they're magical...

They only have a few ingredients, they're packed with goodness, they'll give you energy AND you can have them ready to eat 20 minutes from now! They're nice and crispy on the outside and moist and banana-y on the inside, YUM! With their slow-release energy they make perfect breakfast cookies, or on-the-go snacks for work or hiking etc!

Now I made these today because a) at the moment I have an overwhelming urge to eat cookies/biscuits and thought that if I make a healthy alternative at least it won't be so bad if I fail to keep these cravings at bay and b) I have a lot of bananas left over c) I had run out of healthy snacks and literally only had 20 minutes to spare before I had to leave the house! 

For this, I used wholemeal oats with raisins and papaya (you can literally use any kind of healthy oats)!

Cooking and preparation time: 20 minutes total

You will need:
  • 2 medium sized bananas (the softer the better)
  • 1 cup oatmeal
  • 1 tablespoon honey
  • A few coconut flakes (optional)
Steps:
  1. Preheat the oven to 200° C for fan ovens and 220° for conventional.
  2. Use a potato masher to crush the bananas until they're a runny mixture.
  3. Add the cup of oatmeal and tablespoon of honey to the banana and mix well.
  4. Place a sheet of baking paper on a tray and use a tablespoon to spoon the mixture onto the paper and pat down and shape using the spoon.
  5. Place a few little coconut flakes/desiccated coconut on top of the cookies.
  6. Place in the centre of the oven for 15 minutes.
  7. Remove from the oven and leave to cool on a cooling rack.
  8. Drizzle with honey and enjoy as breakfast cookies or as an on-the-go healthy snack!
Have a beautiful day! Courtney x


Thursday, 29 January 2015

VIETNAMESE SPRING ROLLS


I LOVE oriental food. What's more? I love HEALTHY oriental food. Deliciousness and raw flavour but completely guilt-free! And totally vegan!

This recipe is actually mega easy too, and honestly, really, really good! I recommend a serving of 3 spring rolls per person, served with the rest of the noodles and veg or sushi rice. So the following servings will serve 2. You can see in the background of the image above how much was left over - but this is nice to have with the spring rolls I think.

You will need:

  • 6 sheets of rice paper
  • 3/4 a cucumber
  • 1 large carrot, peeled
  • 200g bean shoots
  • 1 onion
  • 1 pack vermicelli noodles (rice noodles)
  • Basil
  • Sesame seeds
  • Soy sauce
  • Hoisin sauce (homemade recipe here)
Steps:
  1. If your noodles are dry, soak them in boiling water for about 5 minutes and then drain them and add a little soy sauce and basil for flavour. If you have fresh noodles, don't worry about this step.
  2. Cut the cucumber into 3, 3-inch segments and cut away the outsides so that you're left with a block of the seeds - you don't want to use this part. Cut the rest into small matchstick slices.
  3. Peel the carrot and cut into matchsticks.
  4. Cut the onion into small strips also. Add a teaspoon of olive oil or coconut oil to a pan and add the onion and bean shoots to the pan. Stir-fry for 3-3.5 minutes. Then set aside on a plate to cool.
  5. Get a bowl of warm water and dip one side of the paper in, and rotate. And continue to do this for one rotation and then rotate one more time immersing the whole rice paper in the water. This is very important, trying to place the rice paper straight into the bowl will snap it.
  6. Place the rice paper flat and add the cucumber and carrot sticks flat in the centre of the paper. Use them as a guide, trying to add ingredients only on top of them, not allowing them to overflow too much. Then add a small amount of noodles and the onion and bean shoot mix. Sprinkle over some basil and sesame seeds. 
  7. Fold the left and right sides over your ingredients. They should just cover both ends of the cucumber and carrot. Then fold over the bottom layer, follow by wrapping the top layer over.
  8. They should then be complete! Serve with noodles, rice and hoisin/soy sauce.
  9. Enjoy!

Friday, 23 January 2015

SUPERFOOD APRICOT JAM - SO EASY


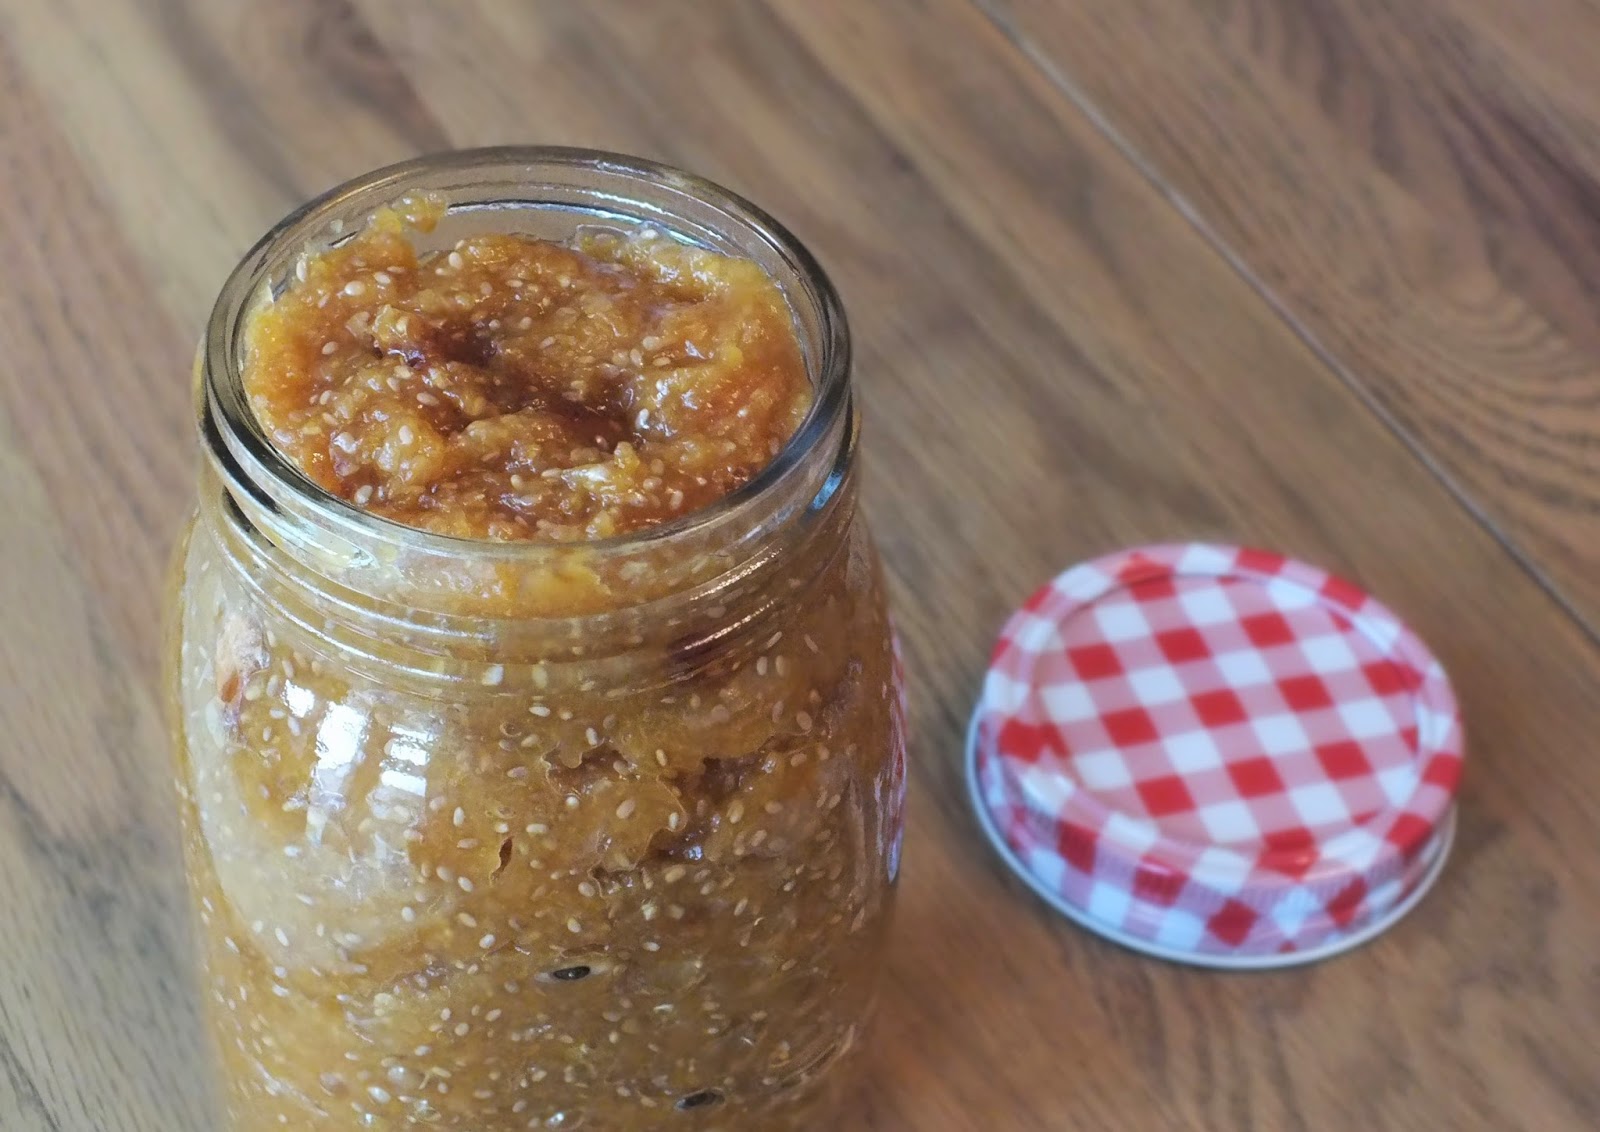
So yesterday was jam making day! I made this one, and also this delicious blueberry jam! The most wonderful thing about these jams is that they're MEGA healthy with only raw natural ingredients and packed full of chia goodness, but THEY'RE SO DELICIOUS! Honestly, I don't think I'll EVER buy supermarket jam again! It's just not worth it! So let's get to the recipe... This made quite a large jar of jam, so I put some of it in a smaller pot for a friend. Also, note that this recipe will be very different based on the kind of apricots you use. Fresh apricots will require almost no water, but dried apricots will require a fair bit of water. I used a 375g packet of soft partially re-hydrated apricots, so used somewhere in between. Note that on the front of the packet, it may not say re-hydrated so you may have to read the fine print. But partially re-hydrated works well! 

You will need:
  • 375g partially re-hydrated apricots
  • 500ml water
  • 4 tablespoons chia seeds (I used Australian white chia)
  • 1 tablespoon agave nectar (or your desired liquid sweetener)
  • 1 tablespoon honey (or your desired liquid sweetener)
Steps:
  1. Put the apricots into a food processor and add half the water and blend for about 2 minutes. Add the rest of the water and blend for a further two.
  2. Add the honey and agave nectar or your desired sweetener and the chia seeds and blend for another 2 minutes.
  3. Place in a large non-stick saucepan on a low-medium heat without the lid (a lot of the water should evaporate off).
  4. Cook for 30-60 minutes depending on your desired thickness of jam. Make sure to stir occasionally so that the mixture doesn't stick or burn. I cooked mine for 45 minutes to get the right consistency.
  5. Enjoy on fruit bread, with yogurt, with granola, etc! (I had toasted fruit bread, mmmm)!


Thursday, 22 January 2015

SUPERFOOD BLUEBERRY JAM - SO SIMPLE AND DELICIOUS THAT YOU SIMPLY MUST TRY IT


Today has been a jam packed day!

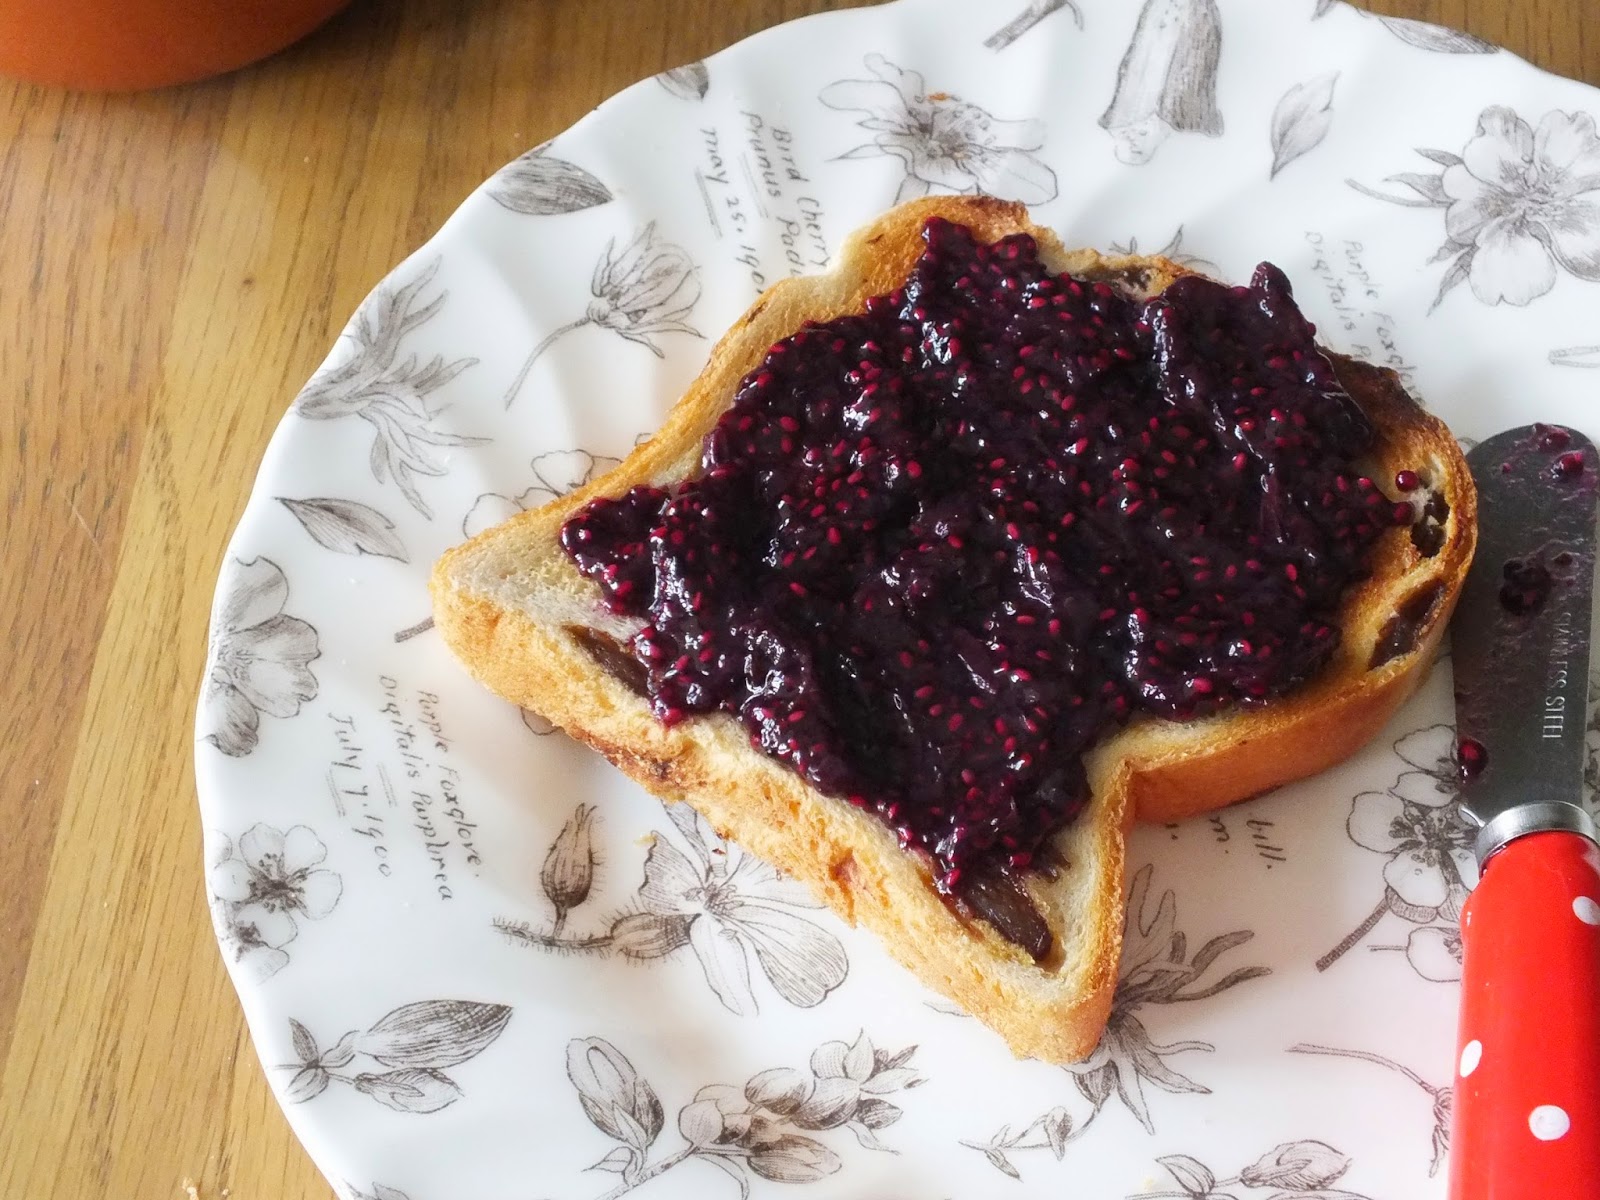
Haha I couldn't resist... But seriously, I made two types of jam today, and this is the first! Blueberry chia jam. Now this is gorgeous. Utterly delicious and SO full of goodness. Like MEGA healthy jam?? Who knew that was possible.. And now I REALLY can't understand why they pack so much sugar and junk into supermarket jam because YOU JUST DON'T NEED IT! This is so naturally delicious and sweet! Please note, this recipe makes a small pot of jam (the one seen above) so is ideal for a breakfast treat for 2-4 people. Especially as blueberries can be expensive! But feel free to double, triple, quadruple the recipe to make a large pot. I enjoyed this natural jam on a slice of fruit loaf, DELICIOUS! Do note, the chia is quite important in thickening the jam.

You will need:
  • A small punnet of blueberries (about 150g)
  • 1 tablespoon agave nectar or honey
  • 1 tablespoon of chia seeds
(yep, that really is all)...

Steps:
  1. Add the blueberries and your desired sweetener to a small saucepan and turn on the stove to a medium heat. As you start to heat the blueberries, use a potato crusher to squash the blueberries (I wouldn't advise blending as you'll lose the lovely texture).
  2. Once the mixture starts to boil after about five minutes, add the chia and turn down to the lowest heat to simmer for about 10-15 minutes or until you've reached your desired thickness.
  3. Enjoy on toast, fruit loaf, yogurt, granola, etc, etc! THAT'S IT!

Sunday, 18 January 2015

A GREEN, LEAN, MEAN SMOOTHIE!


This cup of all green smoothie is yummalicious! And it has got an AMAZING amount of vitamins and nutrients packed into it, in the super combination of avocado, kiwi, spinach, chia and banana to give you long-lasting energy! Perfect for breakfast, or to keep you going between meals.

You will need:

  •  3 small kiwi
  • A dense handful of spinach
  • 1 banana
  • 1 small avocado
  • Teaspoon chia seeds
  • (A teaspoon of honey/agave nectar to add sweetness if preferred)
Steps:
  1. Blend up the spinach with a little water first until that it smooth and then add the other ingredients. 
  2. Blend up the ingredients, adding water until the smoothie reaches the 700ml line.
  3. Enjoy!
P.S If you don't want to add so much water, you could add some natural yogurt.

Courtney x


Saturday, 17 January 2015

COLOURFUL BUTTERNUT SQUASH AND QUINOA SALAD


This dish is absolutely gorgeous and jam packed with goodness and nutrients! And it's so wonderfully colourful! This recipe will make about 4-5 servings, so you can half the ingredients if you like, but I prefer to make this up and have it as on-the-go lunches at work.

*To make vegan, simply don't add the cheese.

Cooking and preparation time: 1 hr

You will need:

  • 1 large butternut squash
  • 1 400g tin of cannelini beans (246g drained)
  • 200g quinoa and bulgur wheat mix
  • 150g pot of edamame beans
  • 75g feta cheese
  • Coconut/olive oil for cooking
  • Salt, pepper and parsley to taste
  • A good, dense handful of spinach
Steps:
  1. Firstly, cut the butternut squash in half and place on a baking tray, with a teaspoon of olive oil drizzled over the top. Put in the oven at about 190 degrees Celsius for fan-assisted and about 210 for conventional. Set the timer for 40 minutes.
  2. Add 800ml of boiling water to a saucepan and bring to the boil. Then turn down to a simmer and add the quinoa and bulgur wheat and simmer for 23 minutes with the lid on. Take the lid off and stir occasionally. After 23 minutes and when most of the water is gone, empty the contents of the pan into a dish and leave to stand for ten minutes, then separate granules with a fork.
  3. Cook the cannelini beans in a saucepan for 5-6 minutes in the liquid they're contained in but make sure not to let them boil - simmer only. Afterwards I like to drain the beans and pour over boiling water to remove any preservatives that were added to the tin. Allow to cool.
  4. Add some coconut oil or olive oil to a pan and add the edamame beans and stir fry for about 4 minutes. Afterwards, put into a dish and allow to cool.
  5. Once the butternut squash has cooked for 40 minutes, carefully remove the skin with a knife (it'll be very hot) and cut into cubes.
  6. Whilst you allow all of the ingredients to cool, cube 75g of feta cheese and wash the spinach.
  7. Combine all ingredients and add salt, pepper and parsley to taste and enjoy!
I hope you love this recipe! Let me know what you think in the comments!

Courtney x


Sunday, 11 January 2015

MORNING BOOST GREEN SMOOTHIE!


Mmmm, a delicious green smoothie for that morning boost is just unbeatable! I made this small serves 1 smoothie with:

A large thick handful of spinach
1 small banana
About 5 medium sized strawberries
About 50ml of water
A teaspoon of chia seeds

So, sooooooo nutritious and healthy and really delicious too!! There's is NOTHING bad about this smoothie! None of the fruits are sugary or acidic so there are NO drawbacks! Horrah! The spinach is packed with iron, vitamin A, K, C, B2 and folic acid and also contains manganese and magnesium. So that will give you a good morning boost! Plus we all know that bananas are GREAT at setting you up for the day and releasing their energy slowly and strawberries are sooo yummy. And of course the superfood chia which is just JAM PACKED with nutritional value! So make sure you make one of these super quick and easy, tasty green breakfast smoothies soon!!!

I also prepared lots of fruit today for the next few days (and you can see another banana and berry smoothie sneaking in the background there too). Enjoy these pictures of all of my yummy fruit!


Thursday, 8 January 2015

NAKD BAKEWELL TART BARS - SOO GOOD


So you may already know from this post and this one that I'm a HUGE Nakd fan, like a SUPER DUPER Nakd fan...

AND THEN ALONG CAME THE BAKEWELL TART FLAVOUR AND THAT HAS TAKEN MY FANDOM TO AN ALL NEW LEVEL.

But seriously, these are incredible - a dream. They're the tastiest things ever (they actually do taste like a bakewell tart just minus the junk)! And they're sooooo good for you! All they contain is: dates, cashews, raisins and a natural flavouring. HUH? REALLY? Yes really. Sooooo healthy.

If you haven't tried Nakd bars before a) you are really missing out b) checkout the links at the top where I talk alllllll about why Nakd bars are so great and c) BUY SOME.

What's better, you don't have to break the bank for these - at Tesco (sorry USA readers :( ) at the moment they're 50p!!!! Which is the same as a chocolate bar?? And that's cheaper than you'll find them anywhere else I believe. SO STOCK UP! I bought 10 to start with to add to my collection which is quickly depleting...

Here's my collection muahaha!!

Tuesday, 6 January 2015

10 WAYS TO BEAT LATE NIGHT CRAVINGS!


So night time cravings are just one of those things... You're bored or watching TV and the only thing you really want is to tuck into a tube of pringles - right? BUT you know that as soon as you've finished those pringles you'll be angry that it's only Wednesday and you've already blown your new diet already (so you'll probably finish off with some ice cream to cheer yourself up because the damage is already done)! Sound familiar?

Yeah we've all had those nights... 

Nowadays I'm pretty good at overcoming late night hunger though, so here are some ways that I combat it, and I hope you find these usefull too!

The thing is, eating late at night can set you back days in achieving your weight loss goals (if you are trying to lose weight) and is just generally a bad thing in a healthy lifestyle because your body has no time to use the energy from what you eat and is already slowing down ready to sleep, so most of what you consume will just get stored and unfortunately you can't 'just burn it off tomorrow'.


  1. Herbal tea
Herbal tea, preferably camomile, green roobios, fennel or a green tea with a little honey can often do the trick. I find that, especially with a teaspoon of honey, a nice herbal tea (which often actually speeds up your metabolism) is tasty enough to satisfy your taste buds, especially if you crave something sweet. Often as well, we think we're hungry when actually we just need water, so a mug of, essentially, infused water is perfect. Besides, herbal teas will help to calm you down and will perhaps stop this agitated desire to eat a bag of sweets! 

   2. Super light crunchy deliciousness

Cucumber and homemade hoisin sauce is a great one. Often, when tea or water just won't cut it, something crunchy will be able to satisfy your body's cravings. And this snack is delicious - even more so if it's a Chinese takeaway that you're craving at 11:30pm! The sauce is pretty low calorie, and the calories aren't really from fat or carbs, so there no risk of your body storing your snack! And cucumber has so few calories that they're not worth counting! (There's a recipe for hoisin sauce here and a delicious dish that goes with it).

   3. Mini frozen smoothies

Mini frozen smoothie pops (homemade and not full of sugary junk of course) are great because they last a while and will make you feel more full after than e.g a cereal bar (which if you're like me disappears in seconds). Make sure to use water instead of orange juice in your smoothies and avoid the sugariest fruits.

   4. Don't mope

Moping around and doing nothing with your evening will surely lead you walking to the fridge in search of 30 seconds of comfort from a chocolate bar! Be productive with your evenings; do some reading, watch a documentary, find some new hobbies like painting, etc! But whatever you do, don't mope! 

   5. Try to include protein and fiber in your dinner

It's shown that protein and fiber will help you to stay fuller for longer, so although veggies are great, include some protein and fiber otherwise you'll be hungry again within half an hour! Beans and healthy grains are a great way to bulk up your dinner and pack in lots of nutrients too!

   6. Go to sleep earlier

Going to sleep earlier sounds silly, but if you're used to staying up until 2am then you're bound to get hungry if you had dinner at 5pm and have now gone 7 hours without any food! Humans are naturally grazers, and going 7 hours without food is unhealthy. So get to sleep earlier. Besides, there's nothing wrong with a snack at e.g 7pm, you just want to avoid anything past about 8pm, based on a bedtime between 10-12, anything later and you're just going too long without food.

   7. Have a bath

I've titled this 'have a bath', but do anything relaxing and tranquil really. A lot of us want to eat junk food out of stress and agitation and our hunger can often be cured by just winding down in the bath, with a good book or going for a walk. But not watching TV or playing on your phone - no electricals! Which brings me on to my next point...

   8. Put down the electricals

Spending all night on your iPad or phone is no good for your brain or your sleeping patters. The back-lit screens tell your brain that you should still be awake, so your body doesn't release (or releases less of) the hormones that are released at the end of the day to prepare you for sleep and making you feel tired - and certainly not feel hungry. So if you want to beat night time hunger, you can't watch Netflix until 1am.

   9. Do a mini workout/yoga

Doing a mini workout - perhaps just 15-20 minutes of stretches and exercises, or a short yoga routine will release endorphins, help you to feel more relaxed and make you feel a little more tired and ready for bed. Besides, after doing a workout, we're a lot less inclined to eat a chocolate bar as we feel like we wasted our time doing a workout.

   10. Structure your whole day

So what this all boils down to and the recurring theme here appears to be that late night hunger is a symptom of an imbalanced lifestyle. If you eat breakfast, a few healthy snacks, a good healthy lunch and dinner with plenty of protein and fiber and do some exercise before settling down to a good, productive and relaxing evening, the chances are you won't even feel this hunger and need to fight it! So think about reshaping your day! With more structure and earlier nights and there's sure to be a change!

Here's a challenge -

Set yourself the challenge to have NO night time binges for 21 days. Write out a list, and make it as pretty and fancy or as straight forward as you like, and write out

Day 1 
Day 2
Day 3...

And tick off each day as you successfully do it! If you cave in, you have to start again from day 1. Once you've made it 21 days it should be habit (and providing you're eating enough during the day) you should no longer feel cravings for junk food late at night!


Here are some BAD suggestions that I came across on the internet, some 'quick fix solutions'...

1. Eat dinner later
Um, no?! That completely defeats the point of trying NOT to eat late at night. Really, our biggest meal should be breakfast as the first meal of the day, then lunch, then a very small meal for dinner as there's little time to burn it off. Eating dinner later is a BAD move. If you're trying to move your health in the right direction, make dinner EARLIER and have a smaller portion and compensate with a bigger lunch!
2. Chew gum
Chewing gum on an empty stomach is bad for you. Your body thinks you're eating and your stomach produces acid to break down the 'food', which results in excess acid in the stomach which isn't being used up breaking down food. So instead it damages the lining of your stomach and can result in stomach ulcers (very bad news indeed). Besides, chewing gum can make you feel bloated or more hungry than before anyway.

3. 'Drink LOADS of water!'
Let's be honest, the taste of water isn't going to curb your cravings for something sweet or savoury. In fact it'll probably just make you feel bloated and ill (and still wanting something sweet). What you should do instead is stay hydrated during the day and make sure to drink water with meals, especially dinner in this case, so that they fill you up more.


But lastly, don't beat yourself up about it guys! We all have those days where we think 'I've had a bad day and I just don't care - I WILL devour a pack of cookies tonight whilst I watch Bridget Jones'. And that's fine! As long as you're not eating giant carby pasta bakes or fat filled burgers at midnight every night... But once in a while, don't worry about it! :)

And here's another idea - don't keep junk food in the house then you can't eat it! Or at least perhaps just some dark chocolate. But this isn't possible for me, and probably many of you, who live with others who keep all of the tempting junk food in the house!

Thanks for reading guys! Please comment and let me know what you think/ what you do at night - I'd love to hear your feedback! And share this post to help others with their late night cravings!

Saturday, 3 January 2015

My first meal from 'A Modern Way to Eat' // Anna Jones


This 'Seeded bread and roast tomato soup' is absolutely delicious yet so simple!

First you roast about 3 medium, vine tomatoes with a chopped garlic clove, some fresh basil, sea salt and a drizzle of olive oil for 20 minutes at 200 degrees Celsius, and then on the stove you add some more basil, a little more salt and a 400g tin of good quality organic plum tomatoes and some water which will evaporate off after a while. You mix this together and then simmer for about 20 minutes to allow all of the flavours to come out. And then that's it! You just add pieces of seeded bread, a little more basil and a drizzle of olive oil over the top and then that's it, it's ready to enjoy. It takes a little while to prepare and cook in total, but it's so worth it for the flavour you get at the end. And this made two dinner portions.

This is the first recipe I have tried from the book and I really can't wait to try the others. This vegetarian recipe book is incredible and I've written a separate post about it which you can read by clicking here (and I recommend you do - it's so wonderful)!!

Courtney x

Monday, 29 September 2014

Nakd Celebration Box!


Ok, I just absolutely have to share this with you! This is the Nakd Celebration box which can be purchased directly from the Natural Balance Foods (the owners of Nakd and Trek) which cuts out the middle man and saves on price.

This box is only £13.99 for 18 assorted bars/snack packs and Natural Balance Foods even threw in two bars for free, so I got 20 bars for £13.99. (I fibbed - actually, my lovely partner bought me this box as a surprise treat after I had been lusting after it). And sometimes, even better than this, the box is on offer for just £10. It's amazing! If you're just getting into Nakd bars, then buy this box (which will save you money on the £0.75-£1 store price of these bars) and will let you trial loads of different flavours to find out which one you love! After trying some of these new flavours, I have added the 'caffe mocha' flavour to my list of favourites. It's so delicious! I love anything coffee flavoured (especially coffee chocolates) and this is thee most perfect alternative. 

I've also discovered that the chocolatey bars (caffe mocha, cocoa orange and cocoa delight) and absolutely amazing warmed up. If you pop them in the microwave for 10-15 seconds then they taste like little fudgey brownies, they're heavenly and so, so nutritious!
There are three different types of Nakd bar, they have the normal variety which is a mixture of different flavours like 'cashew cookie' and 'rhubarb and custard' and they also have a variety of bars which are oaty bars. The oaty bars are the ones with the light cream background - in the photo above you can see 'apple pie', 'banana bread' and 'berry cheeky'. You can also get the crunch variety, which contain small soya crunchies to make the bars more interesting. So, depending on your preferences and what kind of bars you like, there's lots of variety. As well as this, you can get the little bags of infused raisins - so far I've tried the cola ones and they actually taste like cola! They're wonderful little healthy treats.


If you haven't tried Nakd bars before and want to know what they're all about, then check out a post I wrote a while ago, when I first got into Nakd bars, by clicking here.

Thursday, 25 September 2014

Creamy broccoli soup!


So as you may know, I love broccoli (and I also love soup, especially when I feel under the weather) so broccoli soup - why not? This is another super, simple but delicious recipe that you can whip up in no time. If you're feeling unwell, this is especially good as broccoli is packed with vitamins, minerals and iron to give you a boost! This recipe will serve 1 as a large soup for lunch or dinner, or serve two as a starter.

Cooking and preparation time: 15 minutes

You will need:
  • 1 medium broccoli bunch
  • 1 vegetable stock cube
  • 500 ml water
  • 1 garlic clove
  • teaspoon of olive oil
  • Pinch of salt
  • Cream to drizzle (optional)
  • Cheese to add to soup (optional)
Steps:
  1. Cut the broccoli into small florets (this way they cook and blend more easily) and remove any leaves. 
  2. Make up the vegetable stock cube in a jug of 500ml of boiled water.
  3. Add the vegetable stock to a narrow saucepan and add the broccoli florets. Add the garlic, olive oil and salt and place on a medium heat for 10-12 minutes.
  4. After this time, use a hand-blender in the pan (or transfer to a food processor) and blend until smooth and creamy.
  5. Serve up in bowls and add cream and/or cheese to taste, and enjoy!
I hope you like this recipe and don't forget to leave your comments below!


Friday, 19 September 2014

Super simple, chunky vegetable stew with aubergine and zucchini!


This is one of my all time favourite comfort dishes! It's so chunky and warming and comforting... Even though it's summer vegetables, this dish is a great winter warmer. It's also made of just raw foods so is totally vegan and it packed full of so much goodness. This dish is best served with bread (a ciabatta roll is delicious) and salad. Served in medium sixed portions with salad and bread, I would say that this recipe serves 4. I went for slightly bigger portions and had 3 dinners out of this as I kept two meals made up in Tupperware boxes and frozen. So anyway, here it is! If you're unfamiliar with bulgur wheat, check out my blog post about it by clicking here, for all you need to know. Oh, and to avoid confusing, zucchini and courgette are the same thing!

Cooking and preparation time: 20 minutes

You will need:

  • 90g of bulgur wheat
  • 1 tin of chopped tomatoes
  • 2 medium zucchini
  • 1 large aubergine
  • 1 400g tin of chickpeas (undrained)
  • A handful of mushrooms (optional - I just love mushroom)
  • Salad and bread to compliment dish
Steps:
  1. Put 90g of bulgur wheat into a saucepan with 480ml of boiling water and cook for around 12-15 minutes on a medium heat (or until all water is absorbed) stirring occasionally. You can also add boiling water to the chickpeas in a saucepan and cook these on a medium-high heat for around 5-6 minutes. Once these are done take them off the heat and drain the liquid in a colander.
  2. Whilst this is cooking, dice the aubergine into chunky cubes, the zucchini into thick slices and the mushroom into halves.
  3. In a large frying pan add a glug of olive oil and a small amount of boiling water to just cover the surface of the pan. Add the aubergine, mushroom and zucchini to partly cook them on a medium heat. This should take about 4-6 minutes for the vegetables to become soft.
  4. Finally, add the tin of tomatoes to a saucepan and cook on a medium heat. Any ingredients that have finished should be added directly to the tomato as they're done. When all of the ingredients have been added to the tomato, simmer the mixture for about 5 minutes on a low-medium heat.
  5. Season with salt and pepper to taste and serve up with bread and salad and enjoy!
I hope that you enjoy this recipe and don't forget to leave your comments below! :-)

Thursday, 18 September 2014

Perfect garlic and sesame seed broccoli!


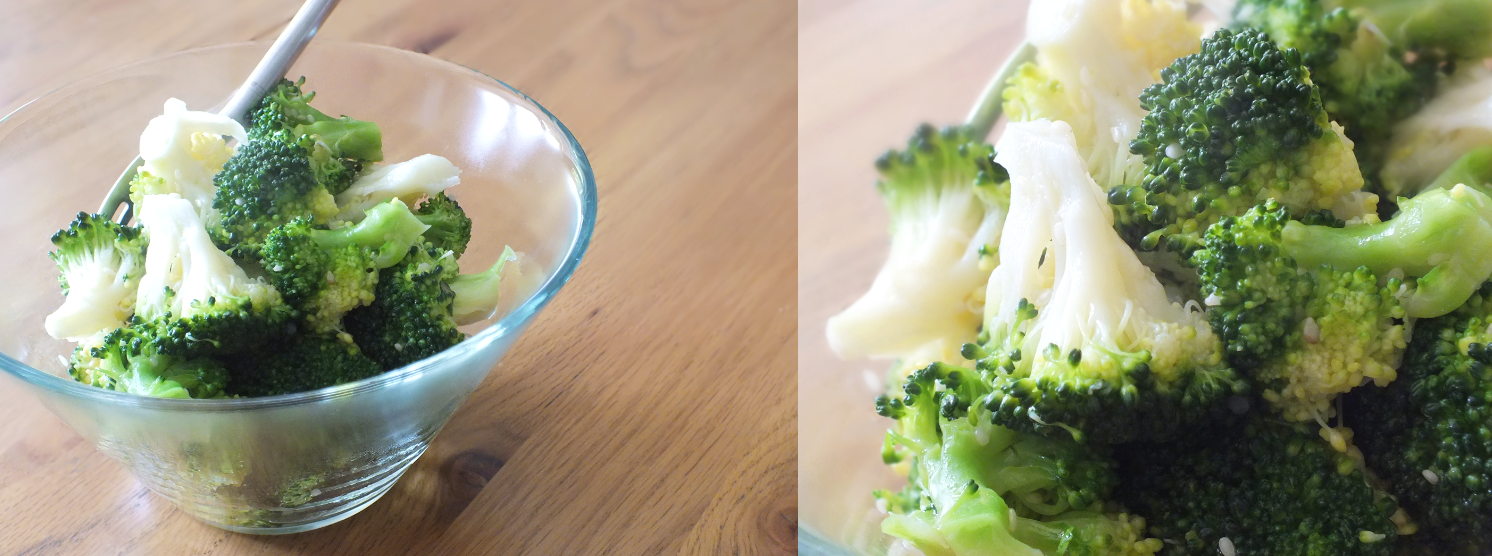
Now obviously this isn't a recipe in itself, just a nice way to cook and serve broccoli (although today I had a whole bowl to myself for lunch because I just love broccoli cooked this was and could do with the iron)! 1-2 tablespoons may seem like a lot of olive oil, but the olive oil isn't being heated to high temperatures and much of it will be lost on the mixing bowl, so fear not! And I can't give you this mini recipe without paying tribute to how wonderful broccoli is - not only is it scrumptious, but it's absolutely PACKED with vitamins and minerals that we need. In fact, one bunch of broccoli has about 900% of your RDA in vitamin C! It's also plentiful of vitamin A, magnesium, vitamin B-6, calcium and iron. So that's plenty of reasons to have this broccoli with your dinner tonight!

You will need:

  • 1 broccoli
  • 1-2 tablespoons of olive oil
  • 2 teaspoons of sesame seeds
  • A small non-heaped teaspoon of Lazy Garlic (or about 3/4 of a clove)
  • Salt
Steps:
  1. Boil the kettle whilst you cut the broccoli into small florets (the smaller, the better the broccoli cooks).
  2. Add the boiling water and broccoli florets to a saucepan on a medium-high heat and set the timer for 5-6 minutes. Add a pinch of salt to the pan and stir in. Place a lid on the saucepan and make sure that the water doesn't over-boil.
  3. After 5-6 minutes, remove the broccoli and drain for at least 1 minute until the water is gone, then add to a mixing bowl.
  4. Drizzle over the olive oil, sesame seeds and garlic and mix in the bowl.
  5. Serve up as a side and enjoy!
I hope you enjoy this style of broccoli and don't forget to leave your comments below! :-)

Sunday, 14 September 2014

Delicious and easy veggie bean burgers!


This was actually my first home-made go at making veggie bean burgers and I really didn't know what to expect, but they were just delicious! And surprisingly easy to make - I didn't actually need to use a food processor or blender at all. Also, you many well have all of these simple ingredients already, so it's just a case of putting it all together. This recipe makes 5 medium sized veggie burgers, so once I had cooked mine, I put the other 4 in a tupperware box and put them in the freezer. I made these a few days ago, and today removed one from the freezer to defrost, re-heated it and had it for dinner and it was just as delicious. So anyway, here's the recipe!

Cooking and preparation time: 1hr

You will need:

  • A 400g tin of mixed beans (or chickpeas/ other choice of beans)
  • 300g of sweet potato and carrot (I used two small-medium sweet potatoes and a large carrot)
  • 1 garlic clove
  • 1 tablespoon of olive oil
  • A squeeze of lemon juice (I used a tablespoon)
  • 4 tablespoons of sesame seeds (optional)
  • Wholegrain buns
  • Salad to garnish
Steps:
  1. Preheat the oven to 190 degrees Celsius.
  2. Peel the sweet potato and carrot and place on a plate and then place in the microwave for about 4 minutes to soften (if your vegetables are still too firm after 4 minutes, leave in the microwave for longer). Whilst the vegetables are in the microwave, drain the liquid from your tin of mixed beans and pour the beans into a large mixing bowl. Use either a potato masher or hand-blender to mix the beans. 
  3. Proceed to mix and blend all of the ingredients together, including the vegetables from the microwave.
  4. Once mixed, grease a baking tray with olive oil thoroughly or use baking paper with olive oil. Divide the mixture into 5 even balls and flatten to form the burger shape. Place onto the greased pan or paper and then turn them all over so that both sides are glazed with a little olive oil.
  5. Place the tray in the oven and cook for 40 minutes, turning the burgers over after 20 minutes.
  6. Add salad to garnish and enjoy!
I hope you enjoy this recipe and please don't forget to leave your comments below! :)

Sunday, 17 August 2014

My first Graze box experience!


So I decided to order my first Graze box, which everyone knows is free some way or another - perhaps you got a token with an Amazon order, or clicked a link - but if you look around for 5 minutes on the web (or even at home) you're sure to be able to get your first one for free and save yourself the £3.99. Which is good, because you need to decide whether or not you like it. You do have to put your card details in, but if you change your preferences to have a box delivered, for example, once every two months, it gives you a very long time before your next box is on its way and hence a very long time to cancel your Graze boxes. You could even cancel your deliveries as soon as your graze box has been dispatched if you're worried you'll forget to cancel it. So in short, don't worry about being overcharged.

How does Graze work? Well first you can select your dietary preferences because if you're vegetarian, you don't want to be sent beef jerky for example! You can also choose to disregard things like spicy food, gluten-containing food, dairy food, etc. And then you can, if you wish, narrow down the vast list of options by selecting a type of box. I chose the 'light' box first of all. After this you can scroll through a huge list of options for the graze box, all with pictures and you can select 'bin' so that the item never gets sent to you, 'try' which is pretty self explanatory and then 'like', 'love' and 'send soon' which just kind of orders all of the products into what you'd rather have and soonest.

When the box arrives! When the box first arrived I was amazed at all of the little things that come with it, including two £5 vouchers to give to a friend to try the graze box too, and introductory booklet and also with every order a dietary guide. I was kind of expecting the snacks to be a bit hit or miss with regards to what's in them, but I was wrong! With every order you get full details of the food's contents just as you would on supermarket products.

And finally the snacks! The snacks are super nice and really good for nibbling on throughout the day perhaps at your work desk or watching your favourite programme. They put together different, natural products to find flavours similar to our favourite calorific guilty pleasures, such as the jam donut which you can see in the picture above. And it actually gave a jam donut kind of flavour! All of the goodies were really nice, nibbly treats which are very natural and low calorie and fat too. So I've asked for my next box in the following week!

I really recommend you give these a go! :-)

Saturday, 2 August 2014

Summer vegetable stew in aubergine boats!


I was feeling seasonal today and wanted to make something with summer vegetables (and also I love aubergine)! But this is really delicious and completely vegan and super duper healthy and nutritious so you must try it! It does take a little while to cook, but doesn't really require any attention, so once you've chopped the vegetables, you're pretty much done! This recipe serves 2! If you're not too fussed about fancy presentation (and would prefer more yummy aubergine) then skip the boat-making stages and simply chop the whole aubergine including the skin, into chunky squares. You'll then have a yummy roasted summer vegetable stew like the image to the right here.

Cooking and preparation time: 50 minutes

You will need:
  • 3 medium sized mushrooms
  • A large handful of spinach
  • 1 large aubergine
  • Half a can of chickpeas 
  • 1 can of chopped tomato
  • 200g of passata
  • 1 large pepper or 2 small
Steps:
  1. Preheat the oven to 190 degrees Celsius.
  2. Cut the mushrooms and peppers into chunky squares and place aside.
  3. First cut the aubergine into half length-ways. Then use a knife to cut the aubergine as seen in the picture to the right, without piercing the skin of the aubergine.
  4. Add the chopped mushroom, pepper and aubergine to a ceramic/glass oven dish. Add the tin of chopped tomato and passata and mix well.
  5. Place in the oven for 30-35 minutes, stirring the stew every 10 minutes.
  6. After 35 minutes, drain the chickpeas and stir into the dish and add the spinach too. Cook for a further 5 minutes.
  7. Remove from the oven and spoon stew into aubergine boats.
  8. Season to taste and enjoy!
I hope you enjoy this recipe and don't forget to leave your comments below!

Hummus and melba toast!


When you're stuck for lunch ideas or are feeling bad about the fried breakfast you had, why wouldn't you reach for the melba toast for lunch? I personally love melba toast, especially if I'm having a lazy day and am not feeling like making an extravagant lunch.. They're low in fat and actually fairly simple with regards to their ingredients too. Not to mention that for around just 100 calories you can have 8 melba toast slices which is enough for a light lunch! 

Melba toast are super versatile and you can put almost anything on them and get creative with designs, or you could just spread your favourite topping on them for a super quick and yummy lunch. My personal favourite is low fat hummus and you can keep eating and eating them without worrying about calories or fat content!

Melba toast vs other crackers? There are loads of alternatives to melba toast such as water biscuits, crackerbread, slims, crispbread, rye crisp bread, oatcakes, corn thins, rice cakes, flatbread and just ordinary crackers! And in terms of fat and calories, some of these, especially waterbiscuits and crackerbread, really do rival melba toast with about the same amount of calories but for slightly bigger biscuits. However, crackerbread, unless it has a lot of flavourful toppings, can be very dry. Thin waterbiscuits however I do really like! I just find that hummus works better with melba toast - so give waterbiscuits a try too, perhaps with light Philadelphia.
You may also like